tutorial using mesh tool
Adding color
Now, we can add color by selecting a node or several nodes. You can select nodes individually by using the Mesh Fill tool (M) or the Shape tool (F10). To select several nodes, press and hold Shift while clicking each node. If you want to select an irregular collection of nodes, choose Freehand from the Selection mode list box on the property bar. This lets you draw an irregular selection area.
At this point, we have a custom gradient fill, which we can achieve by using other tools or effects, such as the Blend or Contour tools. So what's so magical about a mesh fill? We can deform the mesh grid and add unlimited colors. For example, we can select a couple of nodes and move them together in the same direction.
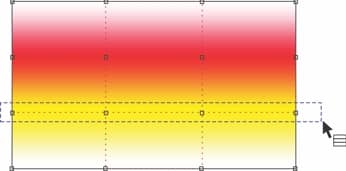 | 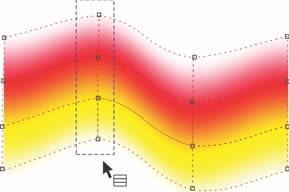 |
One of the most fantastic features of the Mesh Fill tool is the ability to add new colors to any node. You simply select the desired node(s), and choose a color from one of the color palettes. With a mesh fill, the best part is that we don't need a complex drawing to produce good results. Often, the more simple the object, the better the resultant mesh fill.
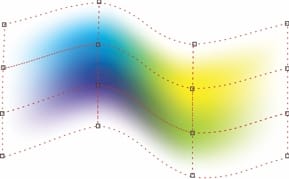
Soft mesh fill
In versions prior to CorelDRAW X5, mesh fills produce hard edges by default; however, there is now a Smooth mesh color option on the property bar. This lets you choose whether you want soft or hard edges.

When editing an object with a mesh fill, most of the property bar options are similar as with any shape. You can select a segment and convert to a straight line or a curve. There are also options for converting nodes to cusp, smooth, or symmetrical. And you can define curve smoothness for any portion of an object. You can also add transparency on one or more nodes, which offers a powerful and exciting way to create unique effects.
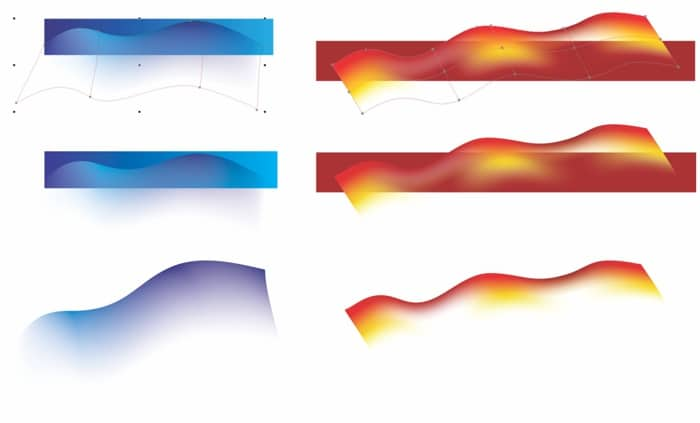
Mesh fill transparency
So, how to add transparency to a mesh fill? Easy, just select the node(s) and then adjust the Transparency slider on the property bar. You can choose different levels of transparency for each node in a mesh filled object. You can also restore node transparency at any time, by selecting the node(s) and moving the slider to zero. The sample below shows a mesh filled object on a black background without transparency (left) and with transparency (right).
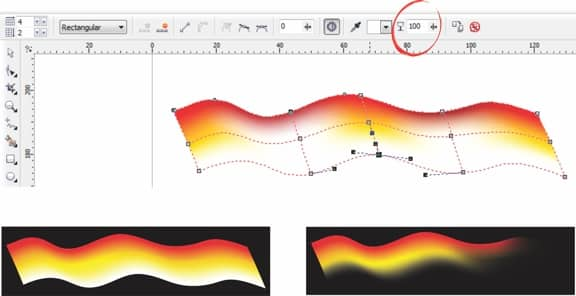
With transparency, you can instantly create soft edges on objects. Since vector drawings are always sharpened, you may sometimes want to create a more realistic appearance by adding transparency on the edge of the object or on selected areas of the object.

Shaping the mesh fill
You have two choices for shaping a mesh filled object. First, as I did with the leaf previously, you can create the object, shape it, and then apply a mesh fill. The second option is to apply a mesh fill to a basic object, such as a rectangle, and then shape the rectangle by moving the mesh nodes. For example, I can create a beer glass by first creating a rectangle, applying a mesh fill, adding color, adjusting nodes, and shaping the edges. I'll use ellipses to give the perspective of the glass opening, and another mesh fill to create a background.
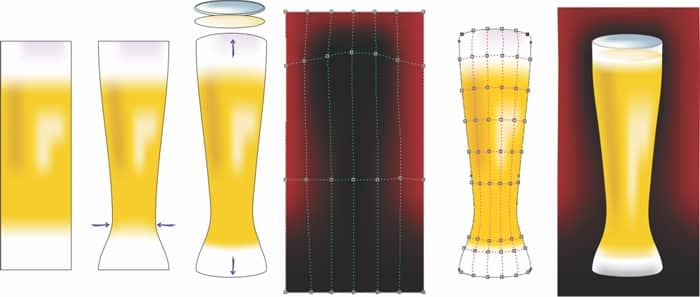
As you can see, the most important thing is to work with simple, or basic, objects for applying mesh fills. Complex objects would be very difficult to handle (see Figure 10; left), while simple shapes let you create great drawing with a high visual impact (see Figure 10, right).
Mesh fill and PowerClip
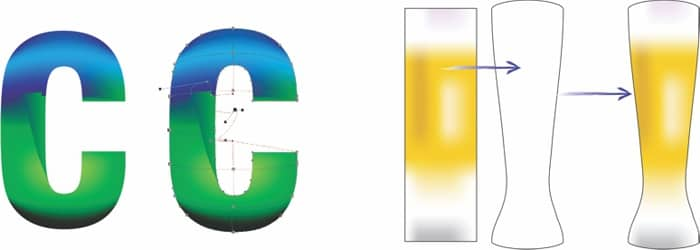
Sometimes, a mesh fill isn't suitable for certain objects; for example, combined objects that are formed by combining two objects into a single curve with subpaths, such as text. Also, if the object if overly complex, the mesh fill will be very complex.
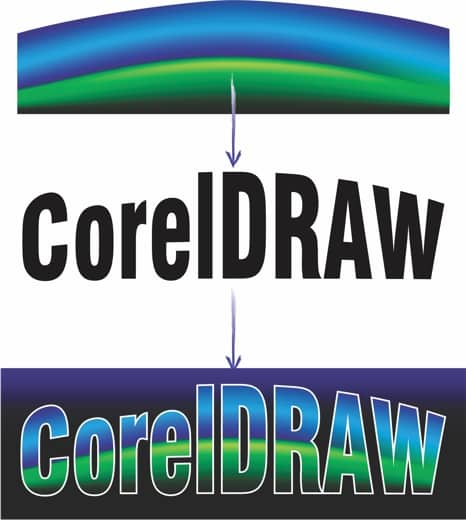
In this case, the best solution is to use a simple mesh fill and place it within a PowerClip (Effects > PowerClip > Place Inside Frame) on the text or object. You can edit the PowerClip (Ctrl + Click) if you want to shape the mesh fill to better adapt to the object.
Applying color to a mesh fill
When you're working with the Mesh Fill tool, the property bar provides a dedicated Mesh fill color palette. This makes it fast and easy to add colors. There's also a Sample mesh fill color eyedropper on the property bar, which lets you choose any color from an existing mesh fill and add it to the Document palette.

Another handy feature of the color palette is the ability to mix two colors by using the Ctrl key. For example, if you have a blue color, and Ctrl + Click on the white swatch of the color palette, the blue will become a shade lighter. If you want to darken a tone, it's best to mix with Composite Black (C:100, M:100, Y:100, K:100), which is the very last swatch on the default CMYK color palette.
Trying a simple exercise with mesh fill
Now, let's create a new drawing. I like to draw flowers, leaves, and animals since mesh fill is more realistic than other effects. Keep in mind, you don't need to be Da Vinci in order to use CorelDRAW to create something better than a bitmap logo or clipart. For this exercise, we'll start with basic shapes to help you discover the magic and power of CorelDRAW.
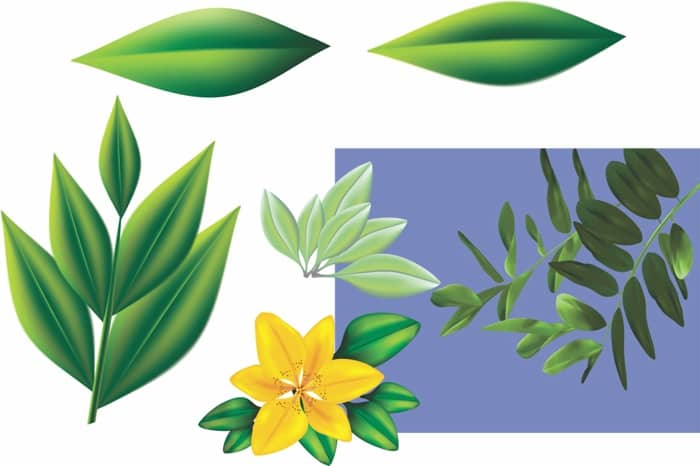
So, how to draw a leaf? From the toolbox, click the Freehand tool (F5) and start with straight lines for a simple drawing. With the Shape tool, drag over the shape to select all nodes, and click then Convert to Curve button on the property bar. The shape's appearance doesn't change. But wait, now select the top and bottom nodes, and click the Symmetrical node button on the property bar. Now the shape resembles an eye, which is a good start for our leaf.

Next, press M to select the Mesh Fill tool, select the center node in the shape and click a green swatch on the color palette. Double-click on the vertical line, and add a new node. Then select the new node and add another color. For example, try a different shade of green. Repeat this process for the rest of the shape and it should soon start to resemble a leaf.

You can create a very realistic drawing with only a few steps. And, if you want, you can add a node close to the shape's border, and then add a transparency on the edge. This will give the drawing ‘soft' edges.
Creating a background
Now, let's try creating an abstract background. As always, start with a simple shape, such as an ellipse. Choose your color and fill with a Uniform Fill. Then, choose the Mesh Fill tool and only add transparency on the nodes. Try 100% on approximately half of the nodes, and 50% on the rest. You can change these values to create different results and combinations.
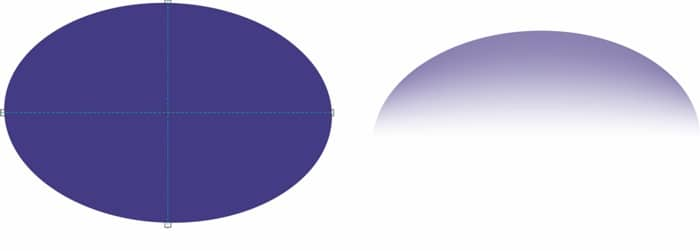
Next, rotate the ellipse, create a duplicate (just press the + key on the numeric keypad) and rotate on a different angle. When finished, add a background (double-click with the Rectangle tool), choose another color. If you want, place the ellipses inside the rectangle, as a PowerClip (click Effects > PowerClip > Place Inside Frame). There are infinite combinations of results, this is only one example.

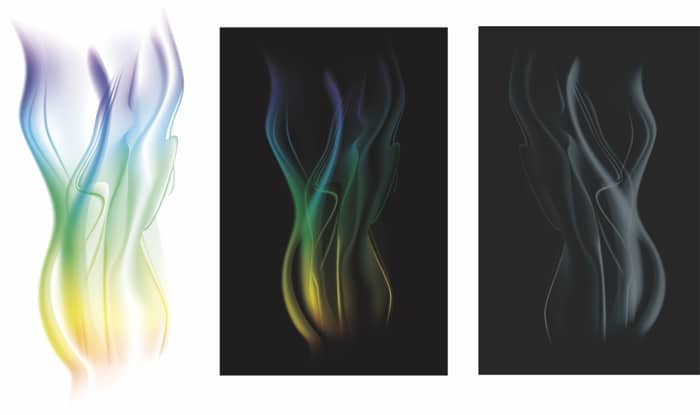
Here's a sample background, or wallpaper, that I created by using the Mesh Fill tool.

And here are some sample abstract backgrounds, also created with the Mesh Fill tool.
A sample mesh fill landscape
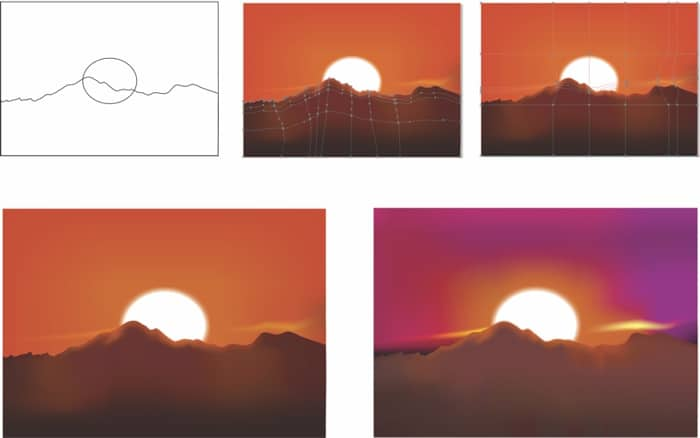
I've included this sample to reinforce that you don't need to use complex objects to create nice drawings. I started with a rectangle, added an ellipse, and then a hand-drawn irregular shape to create a landscape with mountains, the sun, and some clouds. Then I used the Mesh Fill tool to add a few colors, resulting in a realistic and beautiful landscape. To create that soft, glowing border around the sun, I used a simple Drop Shadow.
A sample complex drawing
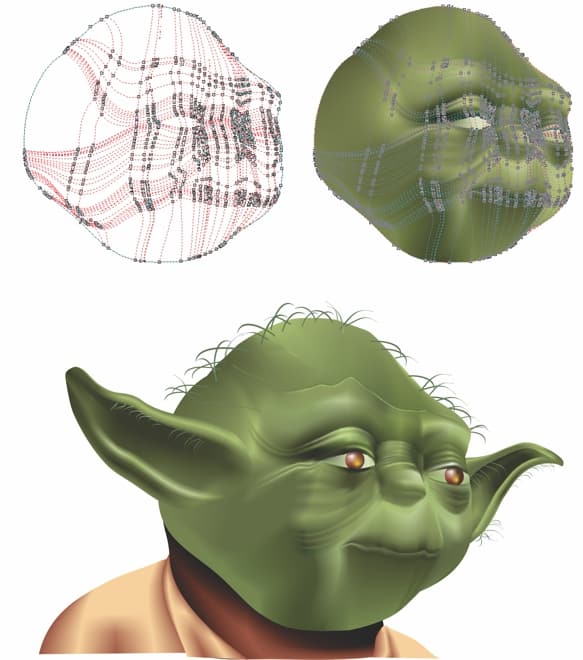
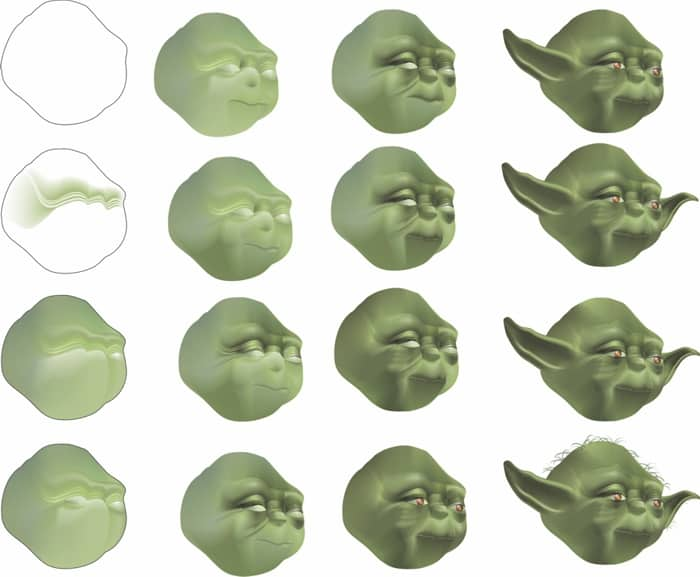
Of course, there are times when you need to create a more complex drawing, such as a face. While that's not as easy as a leaf or flower, the process is similar. The key is to do it step-by-step and not try to do everything at once. These next sample illustrations will show you some steps I've used in the creation of Yoda, the Star Wars Jedi Master.
If you looked at just the final result, the process may seem difficult and daunting; however, by creating separate objects for each step, the process is very easy and fun. With each step, I've added nodes and shaped the face, adding lighter colors and increasing the tint to create darker areas.
Mesh fill with complex shapes
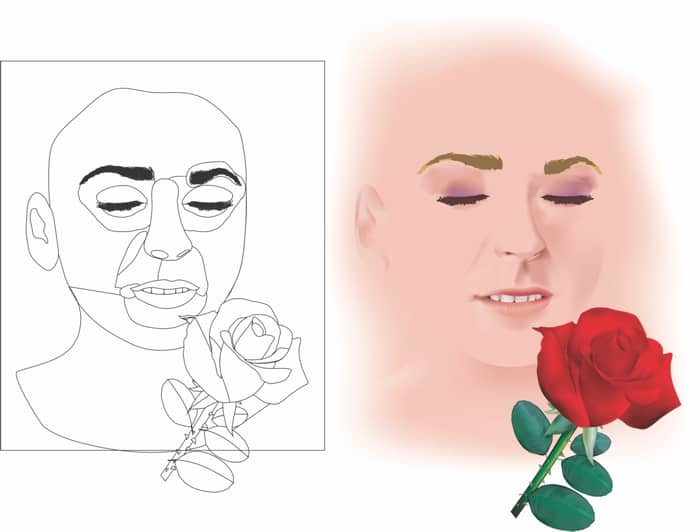
So, what about using mesh fill for a very complex drawing, such as a human face? With Yoda, I used a basic shape and added a few elements, such as eyes, ears, and hair, slowly over a series of steps. The same method is useful for any other complex drawing, which can be a puzzle of little shapes. The new transparency with mesh fill helps to blend any shape with another, and the eyedropper makes it easy to copy exact colors for another object.
Mesh fill and other effects
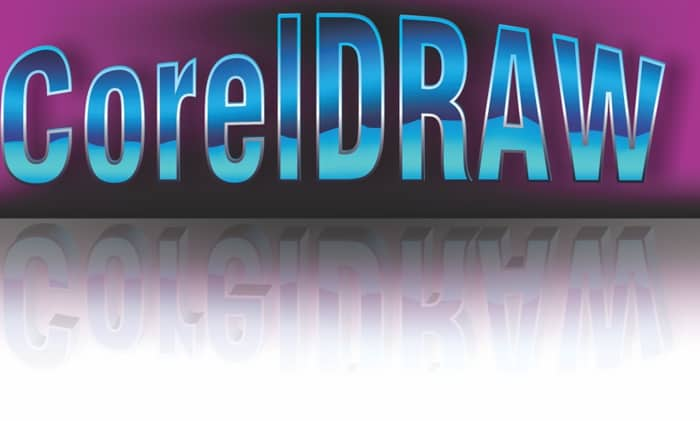
You can use mesh fill together with other CorelDRAW effects, such as Drop Shadow, Lens, Transparency, and more. Certain effects do not all you to build other effects on top of them, so a workaround is to create duplicates. For example, you can apply mesh fill to one of the objects, and place the mesh filled object as a PowerClip within the duplicate object. But take care not to use too many effects at the same time. Remember, the more simple the object, the better the results you will achieve.
Komentar
Posting Komentar